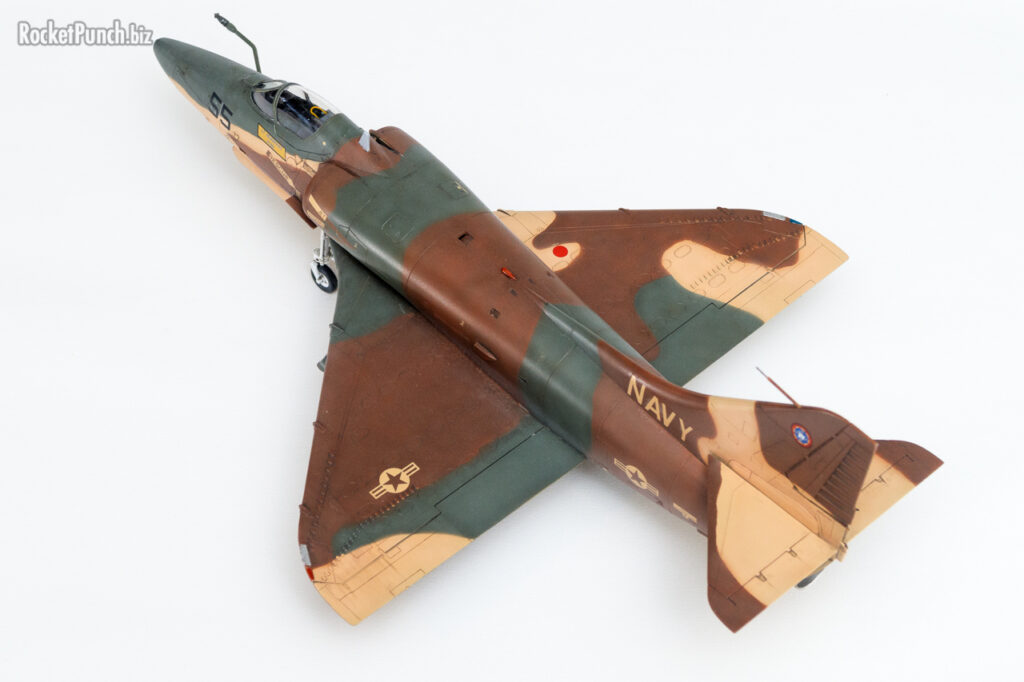


 Kit Info
Brand: Hobbyboss 81764
Scale: 1/48
Media: Styrene
Markings: Fightertown Decals 48-092 Extremely
Adversarial – A-4/TA-4, F-5, F-16
The Subject
The Douglas (later McDonnell Douglas) A-4 Skyhawk is a single seat subsonic carrier-capable attack aircraft originally developed for the US Navy and US Marine Corps. While relatively lightweight, it was nimble, had a top speed of more than 670mph and could carry the same bomb loads as the B-17 Flying Fortress. Deliveries to the USN and USMC commenced in late 1956 and it was withdrawn from front-line service in 1976 and 1994 respectively. The A-4 would however remain in USN service in training units (like TOPGUN) flying as stand-ins for the ‘bad guys’ in Dissimilar Air Combat Training. It will serve in this role in TOPGUN until 1999.
This build depicts TOPGUN 55 (Buno 151095), an A-4E serving with TOPGUN in the mid-1980s. TOPGUN 55 appeared in the 1986 motion picture ‘Top Gun’ piloted by Lieutenant Commander Rick ‘Jester’ Heatherly and Commander Mike ‘Viper’ Metcalf in various flying sequences.
Sources:
Wikipedia – Douglas A-4 Skyhawk
Wikipedia – Top Gun
The Kit
Since 2000, the definitive 1/48 Skyhawk kit was Hasegawa’s release which easily beat the offerings from Monogram, Fujimi and Hobbycraft. In 2017, Hobby Boss released their version of this popular aircraft. Like a lot of Hobbyboss offerings, this is a kit of two halves:
- a pretty nicely detailed cockpit with raised details although decals are also offered
- panel lines are very nicely done overall
- optional one-piece avionics hump
- speed brakes that can be posed open or closed
- option for gun barrels or blank plates
- notwithstanding the boxart, only the earlier straight refueling probe is provided
- slats and flaps are molded in the up position only
- stores include 2x AIM-9B Sidewinders, 2x GBU-8 LGBs, 2x GBU-12 LGBs, 12x Mk.82 iron bombs, 12x CBU-20 cluster bombs. I believe the Skyhawk was not cleared to carry the LGBs though.
- markings are provided for two Skyhawks
The Hasegawa kit doesn’t get re-issued that often and usually commands a high price so it’s nice to see a (slightly) cheaper alternative in the market. However, the lack of the bent refueling probe is a problem and requires the additional expense of a resin part. The slats and flaps being molded in the up position is also a big no-no to many people although to me, it makes for a less fiddly fitting kit.
So this looks to be good in some ways, but somewhat disappointing in others. Let’s see how it builds up though.
 The Build
Overall, the build went smoothly with no noticeable bad fitting areas. I did have to do some work to fair in the gun port covers which were ever so slightly undersized. I was building a Skyhawk with the newer bent refueling probe so I used a resin one from Quickboost.
There are also various small details like the spike antennas that I added and removed based on the few photos I found of TOPGUN 55 and I added the leading edge pitot tube with styrene tubing on the vertical tail.
Construction was pleasantly uneventful which is more than I can say for other so-called top tier brands although the simplified parts breakdown helped.
 Colors & Markings
TOPGUN 55 was painted in a three tone camouflage very similar in hue to the Vietnam-era SEA color scheme except all three hues are a warmer tone. In the end, I decided to mix my paints to match the color of the decals instead of the photos. As I didn’t want to change the tone of my colors, I decided to paint over a basic gray primer coat without any mottling or preshade. Instead, I sprayed the same colors lightened with some light gray to add some paint variation to the finish inside the panels.
I originally used the markings from TwoBobs’ 48-018 ‘Top Gun Tinker Toys’ sheet but they looked overscaled so I removed them and redid the decals using Fightertown Decals’ 48092 ‘Extremely Adversary’ sheet instead. For the record, these are much nicer (but to be fair, much newer) and luckily for me, the colors on the kit still matches the sheet. The demarcations don’t line up in a few spots but at this point, I’m not too concerned (sneak preview: it’ll be worse for the next build. Ominous music…).
Finishing
From the pictures and screencaps TOPGUN 55 looked quite clean so I just went with a panel wash using Flory Models Dark Dirt Wash. The result is somewhat subtle but I think it suits the ‘cleaner’ look of the subject.
Attaching the last bits of the kit went without much issue and if anything, I really appreciated the positive locking in place of the nose and main landing gear.
And with that Jester’s TOPGUN 55 is done. On a sidenote, I have a particular fondness to the callsign. I’ve been using ‘jesTer’ as my gaming callsign since the mid-1990s so this feels like finishing my personal A-4 Skyhawk.
Build Log
Part 1: Construction
Part 2: Painting & Finishing
Number 10 of 2022


