The nose to fuselage join is decent but the two halves of the nose required some considerable sanding to get rid of the seamline. The result of this is that I ended up sanding away almost all the panel lines which were already quite shallow in the first place.

Before rescribing I figured I should go ahead and fix all the seamlines. First is at the back of the Tornado.

There’s also an obvious seamline where the outside intake wall joins the intakes.

I re-scribed as best as I can based on the plans in the decal placement guide.

Initially I thought my re-scribing looks rough, but I think it looks OK after I fitted the stabilizer.

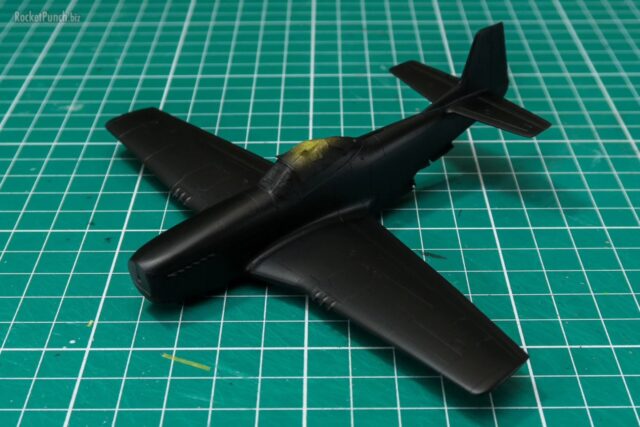
The Tornado is finally taking shape.

The canopy is thankfully easy to mask.

The ejection seats are glued in place at this point. Note the round aurora film I attached to the HUD projector.

The canopy fits positively but I found that the cockpit actuators were not long enough resulting in overscaled gaps.

There’s also an obvious step at the windshield/nose join.

Pictures show that the transition from nose to windshield should be smooth. Note also the prominent blade antenna forward of the windshield that’s simply not on the kit. This will be addressed later on.

So i carefully faired the windshield into the nose using a combination of UV putty, prayers and hope.

I also extended the cockpit actuator with styrene sheet to lessen the gap.

I added the blade antenna under the nose with styrene and also attached the AOA pitots on the side of the Tornado at this point in time.

I had missed out on a small inlet on the belly and attached it but the pylon got in the way of its indicated location. So I simply attached it forward of the pylon. Note the noticeable gap between the fuselage and forward of the pylon.

As is now my practice, I also attached the underwing pylons at this point. However, with the way the inward pylons are designed, It was better to leave them off until final assembly to ease painting.

Main assembly is finished with just the weapons left to tackle.

This limited boxing comes with a pair of Komoran anti-ship missiles but my Marineflieger acquaintance told me that they often carried an asymmetric load of Komoran and AGM-88 HARM instead: deifnitely a more interesting loadout.
The Komoran and HARM used the same launchers and I had a spare Revell HARM and launcher in my stash that I could use. But comparing the launchers, I noticed that there was enough of a difference that I couldn’t mix them. I decided to just the Hasegawa’s launchers for both missiles.

Like the AGM-84 Harpoon, the Komoran is a deceptively large missile. On a sidenote, the pair of Komoran missiles are only ever available with the Marineflieger Tornado variant releases: these aren’t included in the Hasegawa European Weapon Set.

German Tornados typically carried a Cerberus ECM pod and a BOZ101 dispenser. Hasegawa provides a pair of early Cerberus ECM pods and indicates that both should be mounted. Pictures show that by the 90s, Marineflieger Tornados carried the upgraded Cerberus which is the one that’s included in Revell’s Tornado release. The BOZ-101 dispenser is also in the Revell Tornado. As mentioned, the AGM-88 is from Revell and I added a small styrene tab on the Hasegawa pylon to help ‘locate’ the missile when mounted.

Hasegawa also provides a decent pair of AIM-9L Sidewinders which I detailed up by adding the small ‘rudders’ on each fin with 0.18mm styrene.

It’s unfortunate that Hasegawa doesn’t provide an accurate (nor complete) set of stores for a Marineflieger Tornado.
All that being said, I’m finally ready to move on to painting.
Build Log
Pt.1 – Construction | Pt.2 – Construction | Pt.3 – Painting
Pt.4 – Painting | Pt.5 – Finishing