


 Kit Info
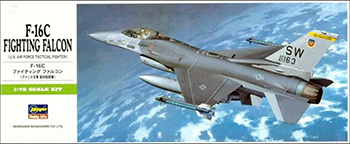
Brand: Hasegawa
Scale: 1/72
Media: Styrene
Markings: Xtradecals X00872 and kit
The Subject
The Lockheed Martin (originally General Dynamics) F-16 Fighting Falcon is a multirole jet fighter. It currently serves in 25 nations, with over 4,400 aircraft built. Commonly known as the ‘Viper’, it features innovations including a frameless, bubble canopy for better visibility, side-mounted control stick to ease control while under high g-forces, and reclined seat to reduce the effect of g-forces on the pilot. It is also the first fighter to be built to sustain 9-g turns.
Entering service in 1987, the F-16C Block 30/32 were the first blocks to have different engines installed. Initially, the aircraft looked identical except for the engine nozzles with the Block 30 being powered by the F110-GE-100 engine. Some Block 30s would eventually be upgraded with a larger intake due to the increased thrust of the GE engine. There would be further upgrades to both the Block 30/32s including Radar Warning Receiver (RWR) antennas on the leading edge flaps and targeting pods for precision strike. A total of 733 aircraft were produced and delivered to six countries.
The build depicts 86-227, an F-16C Block 30C from the 480th Fighter Squadron ‘Warhawks’ in 1988. The squadron is part of the 52nd Fighter Wing, flying out of Spangdahlem Air Base, Germany. The 480th began receiving the F-16C in April 1987, initially operating it in tandem with the F-4G Phantom II to form hunter-killer teams within the squadron. During this time, the 480th F-16s carried sharkmouth markings which was the primary reason I went with this particular F-16.
Sources
Cybermodeler – F-16 Fighting Falcon Variants
Wikipedia – 480th Fighter Squadron
Wikipedia – General Dynamics F-16 Fighting Falcon
The Kit
Originally released in 1985 as the F-16A, the F-16C variant with additional parts was released in 1987. The boxing that I built has a re-designed box and was originally released in 2000. This means, as of this writing, this mold is already 36 years old. In any case, this is one of Hasegawa’s classic kits which has held up surprisingly well. It’s also still the only game in town for an earlier F-16C. The The details in the wheel wells can’t quite be compared to the more modern competition and flash is started to creep in but other details are still quite nice with finely done panel lines throughout. Details include:
- a very basic ejection seat with decals for all consoles
- pilot figure with old style flight helmet
- canopy can be posed open
- pilot ladder included
- canopy is clear but older F-16s usually have tinted ones
- lowered landing gear only
- there’s a general lack of details inside the exhaust nozzle and gear bays
- stores included are 3x external fuel tanks, 2x AIM-7J Sidewinders, 2x AIM-9L Sidewinders, 2x BL-755 Cluster Bombs (which aren’t used by the USAF)
- decals are of the new variety where the whites are really white
- 3 schemes included: 363rd TFW 10th TFS ‘Gamecocks’, 86th TFW 512nd TFS and 58th TFW 312nd TFTS. All are USAF F-16s.
As I’ll learn somewhat too late, this kit can only get you an F-16C Block 25 or an early Block 32 out of the box. You’ll need additional parts to get a modern Block 30/32 and at least a GE exhaust nozzle for an early Block 30.

The inspiration for the build
The Build
This F-16C was built as part of my SAM Hunters collection after seeing a photo of a hunter-killer team of an F-16C loaded with AGM-88 HARMs and an F-4G Phantom II Wild Weasel V. Even more striking, the F-16C was sporting a sharkmouth marking. I eventually managed to get my hands on an Xtradecal sheet (X00872) that offers the same sharkmouth styled F-16.
The kit was a straightforward build with the only a few issues. The seat was bare so I dressed it up with belts using masking tape and detailed the seat with plastic bits. I decided to leave the wheel wells as is. The 4-part intake took some trimming and adding a spreader to fit better. After cementing the top and bottom fuselage halves together I replaced the static discharge lines on each side of the nose with very fine stretched sprue. Considering the age of the mold, the kit fit together well after cleaning up the flash. Weapons-wise, I went with what was in the photo: 2x AGM-88 HARMs, 2x AIM-9L Sidewinders, 2x underwing tanks and an empty centerline pylon. The AGM-88s came from the Hasegawa Weapons Sets and I scratchbuilt the LAU-118 rails from plastic sheet using the Tamiya LAU-118 as reference.
 Colors & Markings
I painted the F-16 in its original 3-tone gray camouflage of FS36375, FS36270 and FS36118. The instructions called for the leading edges of the stabilizers to be the medium gray color but after looking at photos I decided to leave them as the darkest gray instead. I went back to doing a preshade instead of my usual marbling just because. I also tinted the canopy with Tamiya X-19 Smoke.
Decal-wise, the main markings are from the Xtradecals sheet while all the stencils are from the kit. The decals went on without a problem and reacted well to Mark Setter and Mark Softer. I did have to cut the sharkmouth decal into 4 pieces and re-assemble them on the kit to get a proper fit. I also handpainted parts of the sharkmouth to get the teeth to align properly and also to have it look like it was painted over the stencils instead of under them.
The stencils also went on without issue except for one of the walkways which I had cut wrongly. The bigger problem though was that the walkways and USAF insignia decals all looked too yellow. Since I didn’t have replacement aftermarket stencils I had to figure out a way to fix it. In the end I misted Mig AMMO Shader Grime, Starship Filth and Tamiya X-19 Smoke to knock down the color of the stencils. I think it worked although if you looked carefully, you can tell that there’s been some work done specifically on those decals. For the stencils that folded and cut wrongly, I replaced them with the decals from another Hasegawa kit.
Finishing
Weathering was my standard thinned AK Abteilung Starship Filth for the panel wash and additional staining on the bottom around the exhaust nozzle area. After I was happy with the weathering I attached the stores and landing gear. I had some problems with the stores and I will be adding better pins to make my life easier next time. The landing gear are also somewhat finicky fits and it only went smoother after I extended the pins on the gear legs for easier fitting.
Up to this point, my research showed that I could build this kit as an early F-16 Block 30 until a friend pointed out that it couldn’t when he saw a photo of my kit. I thought I had the details right: tinted canopy, no beercans on the leading edge flaps, small mouth intake, non-bulged gear doors and longer tailfin base. I went back and researched some more and it turns out the shapes of the engine nozzles are slightly different between the Block 30 and 25/32 after all: the F110-GE-100 engine should have a smoother and shorter look to the its nozzle petals, similar to the F-16 Block 40/50s. After some teeth gnashing and realizing there’s no easy way to replace the nozzle, I decided that I’ll just have to live with it.
After removing the canopy masking, I found that the starboard headrest antenna I scratchbuilt had detached and got wedged into the space between the coaming and the canopy. I could have popped off the canopy and tried to fix it but since I think I’d already done a decent job attaching the canopy I decided not to try my luck anymore.
So, my carelessness with the engine nozzle caused a somewhat major disaster. I’ll suck it up and move on though. At least I’m done and I have another SAM Hunter in my collection.
Build Log
Part 1 : Construction
Part 2 : Painting & Finishing
Number 06 of 2021


