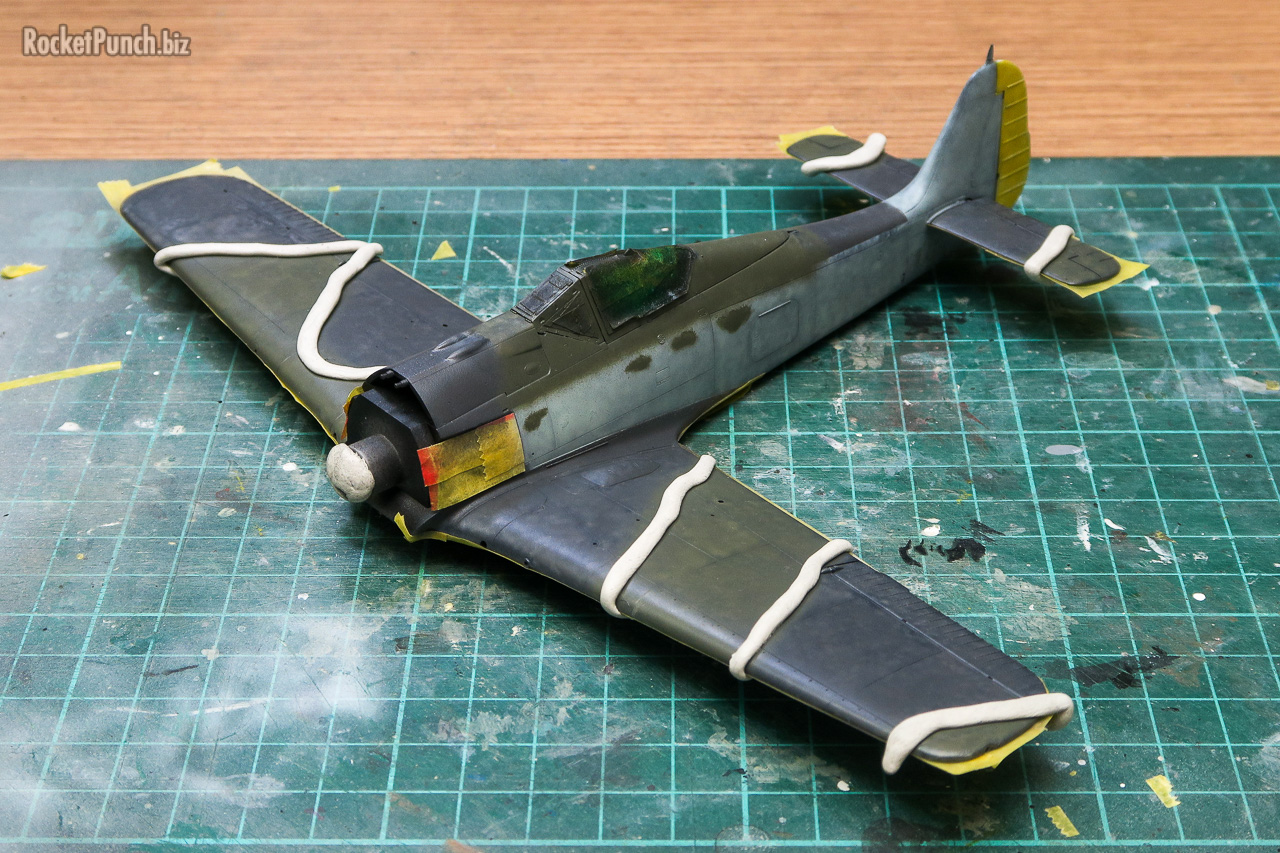
So unlike my previous WWII builds, I’ve decided to keep the cowl separate for ease of painting.
My marble coating is usually quite haphazard so I decided to try a finer look to it for this one. I also avoided marble coating most of the panel lines. It’s a lot more work doing it this way.
The first color on is RLM76 for the bottom. In this case it’s AK Interactive RLM76 thinned slightly and cut with Glaze Medium. The finer marble coat is still showing and I think it looks
The side of the fuselage is also RLM76.
It looks good after a few thin coats of paint.
It looks better when compared to my usual haphazard marbling coat. The $64 Million question though is whether it will look too subtle by the time I add various clear coats and weathering.
Next I painted the parts rudder and cowling yellow RLM04 with AK Interactive RLM04. To get the yellow bright and contrasty I first painted a heavier marbling coat of white on them. Once dry I starting masking for the main color scheme.
This Fw 190 carried the standard RLM74/75 color scheme with hard demarcations on the wings but softer ones on the fuselage. There’s also the usual mottling of the 2 colors over the areas that are RLM76. The color scheme was done with AK Interactive RLM74 and RLM75.
I wasn’t really satisfied with the result I got using AK Interactive here. I think it’s partly due to the fact that I’m using acrylic paint which has bigger pigments than lacquer paint. Plus my general lack of subtle control of the airbrush didn’t help either. In any case, I’m considering using a lacquer next time to see if I can do better.
Overall it looks OK from distance.
The cowling is finally attached at this point and I finally have a proper looking Butcher Bird. I then gloss coated everything to prepare for decals.
I’m using kit decals and it went well until I got to the wing crosses. As you can see, the starboard one broke into pieces. I carefully aligned them but it’s far from good.
Nothing that paint can’t fix eh?! Out came masking tape and pieces of paper and the repairs begin. I put paper over exisiting decals to prevent any masking tape from lifting them.
The result is acceptable to me.
Besides the wing crosses, the red tulip markings on the cowl tore in places and also didn’t quite meet the end of the cowling so I touched them up by handpainting RLM23 Model Air Red. For the walkway lines I ended up cutting into 3 pieces and re-aligning them on the wings. I then added handpainted chipping using Mig AMMO Matt Aluminium.
Is this subtle enough? I’m still finding it difficult to not overdo it. after this I blasted everything with a satin coat. Weathering is next.
The panel wash was done with thinned Abteilung Starship Filth. The result is quite subtle but I like it.
I added exhaust stains using thinned Model Air Dark Panzer Grey. The other streaks however was done with Mig AMMO Starship Filth and Filth Shaders.
The bottom was also done using the same Mig AMMO Shaders.
Checking my work, the exhaust staining was definitely over done.
So I carefully wiped it away using a cotton bud soaked in Vallejo Airbrush Cleaner and do over.The result of a gentler pressing of the airbrush trigger is a less sooty-looking exhaust stain. I moved on before my luck ran out.
After half a day of curing I misted a flat coat over the kit to tie everything together. I checked the final work and I think it looks alright.
After attaching the landing gear, I added the bits on the wings like the pitot tube, gun barrels and surprisingly, wingtip lights! The lights were handpainted transparent blue and red as per usual.
Last off was the canopy masking. There was some overspray (underspray?) so I cleaned them up with a Vallejo Airbrush Thinner soaked cotton bud. This is another big plus of using acrylics in my opinion. You wont’ be able to do this easily on cured lacquer paint.
I showed the above photo to my friend and he commented that the cowling looked too clean. So I decided to see if I can weather it a bit. I first started with sponge chipping using Model Color Black Grey and then adding mild streaks and staining with Abteilung Starship Filth oil paint. I resisted and managed to go easy on these.
Last on is the rigging using Infini 1/48 Fine Aero Black Rigging which are 0.082mm thick. It’s just as easy to use as Mig AMMO’s rigging as it’s just as elastic but I’ve found that it kinked more easily from the tweezer tips.
And now I can call it done.
Build Log
Pt. 1 – Construction | Pt. 2 – Painting & Finishing


