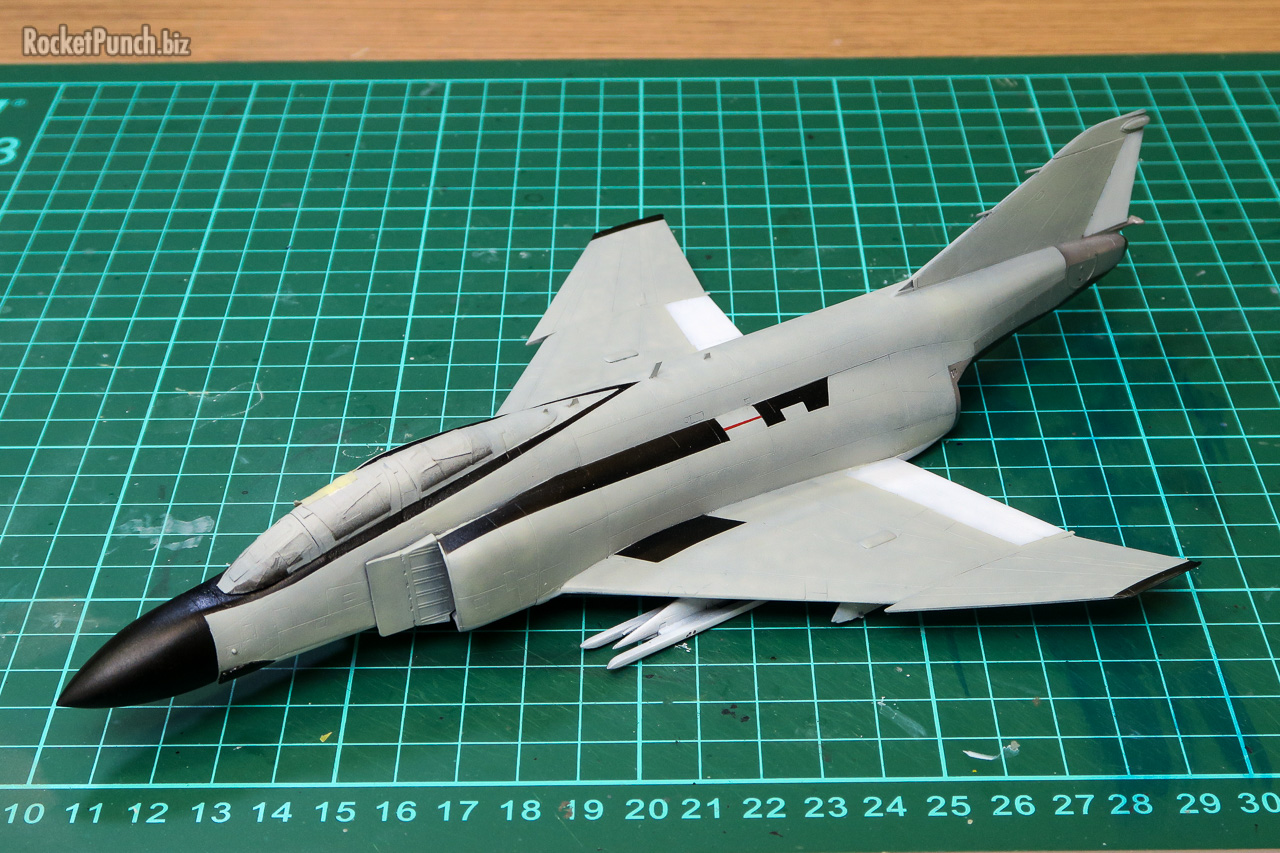
Instead of stripping the pebbly paint I decided to simply sand and buff smooth as much as I can. I could only do the best for the hard to reach areas like the inside of the inner pylons though. I also tried to improve the fit of the canopy onto the fuselage. This kit really needs a 1 piece canopy in my opinion.
I also did a coat of lacquer thinner all over the kit to further smoothen the surface, Once that was done I then primed black and then did a marble coat in white.
Showtime 100 was painted in the usual FS16440 Light Gull Gray and white color scheme. I used Mr Hobby Acrysion Light Gull Gray for FS16440 and Mr Hobby Acrysion Flat White for the bottom.
If thinned properly and sprayed in very light coats, the marbling coat will still be visible.
The Showtime 100 decal sheet I have from Yellowhammer only includes the main markings and doesn’t include the skunk tail behind the canopy. Nothing that some masking tape won’t fix eh? I also masked off the exhaust area at this time.
Everything was painted with Tamiya X-1 Black which gives a very nice glossy finish especially when thinned with lacquer thinner.
Notice the unique design of the skunk tail compared to the usual ones.
VF-96’s F-4s also didn’t have the usual dark gray walkways. They were black instead. I found a set of black walkways from the Hasegawa F-4B CVW-15 combo kit but I decided to mask and spray them instead. I’ve done it before for my RF-4C build so I might as well eh?
Unlike the ones on USAF F-4s, there’s a gap with a red line connecting both parts of the port walkway on the US Navy Phantom.
Again, I sprayed everything with Tamiya X-1 Black.
The result is quite good although I need to fix that very tiny gap on the port wingroot. I also need to mask and spray the red line on the port walkway gap.
Next, I tackled the exhaust area. The base color is Tamiya X-1 Black.
I followed my RF-4C build by first spraying Vallejo Metal Color Jet Exhaust for the lower area. I then masked this area off.
The upper half of the exhaust section was sprayed Vallejo Metal Color Pale Burnt Metal. Notice the chipped paint on the gray area where the photoflash cartridge launcher is located. Yay acrylics!
After struggling somewhat to attach the weapons on my previous F-16C build I decided to make my life easier by adding pins from 0.5mm brass roads on the stores.
I then spent some time to tightening up the walkway markings and chipped paint and I’m eventually ready to move on to decals.
Build Log
Part 1 – Construction | Part 2 – Painting | Part 3 – Finishing


