Kit Info
Brand and Kit Number: Italeri #1235
Media: Injection Plastic
Markings: Cutting Edge Modelworks CED72048 EF-111A Sparkvark Nose Art
The Subject
The EF-111A Raven was an electronic warfare aircraft designed to replace the USAF’s B-66 Destroyer. Grumman was contracted in 1974 to convert 42 existing General Dynamics F-111A Aardvarks into the EF-111A.
Built around the An/ALQ-99E jamming system, the primary electronics were installed in the internal weapons bay. The transmitters for the system were fitted in an underbelly ‘canoe’ radome and the receivers were fitted in a fin-tip ‘football’ pod similar to the EA-6B Prowler. The EF-111A Raven was unarmed, and depended on its speed and acceleration for self-defence.
The EF-111A entered service in 1983 and served until 1998, when the last was retired from USAF service. The USAF would begin depending on Navy and Marine Corps EA-6Bs for electronic warfare support thereafter. While it’s officially named ‘Raven’, its crews often called it the ‘Sparkvark’ instead.
This build depicts EF-111A 66-6033 nicknamed ‘No Fear No Gear’ during Operation: Southern Watch in 1995. Originally named ‘No Fear’, ‘No Gear’ was added after a landing mishap where the landing gear were damaged. The artwork was done by Senior Airman Vanessa Snedeker. The artwork was fairly short-lived: it was removed after returning from deployment.
Info from Wikipedia
Info of ‘No Fear No Gear’ from decal sheet
The Kit
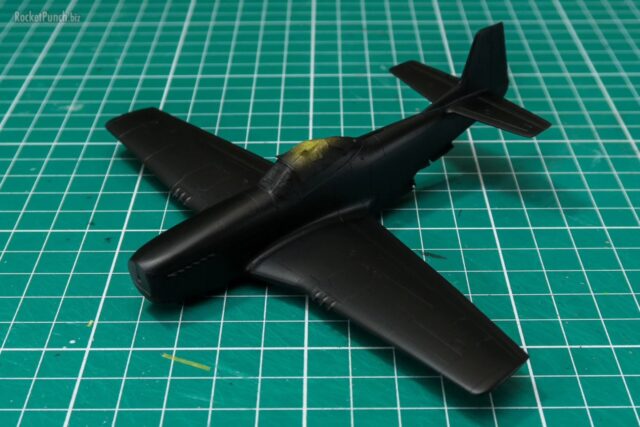
This is a rebox of the Esci kit that was released in 1988. It features decently done recessed panel lines and parts breakdown is very simple and straightforward. It’s almost as if Esci wasn’t planning on releasing a plethora of variants. How quaint. The cockpit details are decals but the side console decals are not included. The wings are designed to swing in and out but there are no options to lower the flaps, slats and the prominent wing gloves which Hasegawa would offer in 1993 with their own release. There is also no gear-up option.
The canopy is molded in 3 pieces but there’s no option to have it open. The only stores offered are 2 external fuel tanks with the mounting points on the wings already pre-opened. Decal options are for 2 all-gray plain EF-111s from the 27th and 388th TFW. All in all, a kit of its age: just detailed enough to be interesting but can’t compare to modern kits with wiz-bang molding technology.
The Build
This was definitely not a shake and bake even though the parts breakdown is simple. Various issues cropped up:
- The tail boom angles down when fitted which required shimming with plastic card, a rod to pin the new extension and epoxy putty to reshape the bottom of the tail boom.
- The intakes don’t fit well at all and these also require shimming and sanding back to shape.
- The joint between the front and rear fuselage doesn’t lie on a natural panel line so I had to fix this. Superglue + baby powder ended up being the best for rescribing.
- I also used epoxy putty to reshape the plate on the bottom where the front and rear sections meet. The plate itself was too small at the corners.
- The canopy didn’t fit well with the instrument coaming in place and I had to somewhat brute force it in place with cement, which ended up pinging the HUD off.
- I detailed the cockpit side consoles with plastic sheet to ‘busy’ it up. It’s neither accurate or to scale but looks OK from 2 feet away.
- I made a mistake with the small underbelly winglets. I positioned them behind the landing gear instead of above them. Luckily the landing gear (barely) clears them.
- I added the prominent GPS dome that was fitted onto the EF-111 in the 1990s with a punched plastic sheet. I think it looks over-scaled but it’ll do.
- The exhaust nozzles don’t fit properly without trimming one of the protrusions. The instructions were also unclear about the correct alignment of the exhausts so I had to refer to photos.
- Ravens usually did not carry external fuel tanks operationally so I filled the holes for the pylons up by melting some sprue into them.
So, by no means was this an easy kit. Still, I had fun building this one which isn’t something I’d often say since I have a distinct distaste for endless seamline fixing and sanding.
 Colors & Markings
Well, like most modern combat aircraft, the EF-111 is various shades of gray. I checked out photos on the internet and also like most modern combat aircraft, the grays pretty much look different picture to picture. The Cutting Edge sheet I was using the markings from indicated the main colors being FS36320 and FS36492 with the leading edge of the tailfin and nose being a mix of both. I went with FS 36495 which was the closest one I had to FS36492. I mixed the 2 grays for the rest of the gray parts like the nose and the tailfin’s leading edge.
Inspired by Gary Wickham’s RAF Mosquito build on Scalespot, I decided to try out his method of adding color variation to the paintjob. I simplified the method but it was effective: there is now some color variation on the paintwork even before weathering. However, I wasn’t sure I was over or under-doing it. Anyway, it’s all about learning new stuff for future builds.
The process proved to be quite time consuming as I’m slowly building up the colors with a low pressure and very thinned paint. The results however, makes the kit look more visually interesting with a patchy look that’s quite different from the usual pre-shading method.
After a few rounds of painting it was time for the decals. The EF-111 is quite bare markings-wise which is a good thing as I really don’t like doing stencils, especially in 72 scale. I decided to go with ‘No Fear No Gear’ for the noseart as this marking is rarely done by modelers and it has an interesting backstory. The decals went on easily and reacted well with Mark Softer and I was done in no time.
Finishing
One common theme about the EF-111 is that they are usually quite well maintained so I went easy on the weathering. It was pretty much just a simple oil wash and some panel filtering with Raw Umber. Another reason for going easy was that I didn’t want to end up covering all the painting variation I had done. AK Matt was last on to tie everything down. With some matt coat left in the cup, I did an overall heavy coat over the kit which resulted in them drying in a patchy pattern under a certain angle. Not a bad look I think.
Next I did the wingtip lights with a silver base and transparent red and blue color and Future brushed on. The lines for the lights weren’t on the kit but I just added based on photo references. Last off were the canopy masking which is always heart-stopping. Turns out the Future hadn’t cured properly and lifted with the masking tape. I went over them with handbrushed Future. Overall, the canopy didn’t quite sit right with gaps between the 3 panels being quite wide. I really should have test fitted everything before I have gotten too far.
So, another modern jet subject for my display case is done. The build didn’t go smoothly and it’s also not perfect with some obvious mistakes and poor workmanship. However, I did have a lot of fun seeing this build to completion and now I’m itching to do more cockpit detailing and experimenting more with painting.
Build Log
> Part 1 : Construction
> Part 2 : Construction
> Part 3 : Painting
> Part 4 : Finishing
Number 4 of 2017