Kit Info
Brand : Italeri No.1236
Media : Injection Plastic
Markings : Kit
The Subject
The Sea Harrier is a further development of the Harrier Jump Jet. It is a naval short/vertical take-off and landing (S/VTOL) subsonic jet fighter designed to replace the de Havilland Sea Vixen. Largely based on the RAF’s Harrier GR.3, it features a ‘bubble’ canopy for better visibility, a longer fuselage to fit the Blue Fox radar and corrosion resistance alloys and coatings compared to the land-based variant.
The Sea Harrier features 4 rotatable nozzles which can be pointed down for the aircraft to lift off and land vertically (VTOL). Angling the nozzles also allows STOL operations, reducing the amount of runway needed for take-off and landing.
The Sea Harrier FRS.1 entered service with the Royal Navy in 1980. Affectionately called the ‘Shar’, its principal role in the Royal Navy was to provide air defense for task groups centered around the aircraft carriers. 57 would be built for the Royal Navy starting in 1978.
Sea Harrier FRS.1s took part in the Falklands War of 1982, flying off the carriers HMS Hermes and HMS Invincible. Primarily flown for the air defense role and armed with the latest AIM-9L Sidewinder missiles and Blue Fox radar, the 3 Sea Harrier squadrons totaling 28 aircraft would shoot down 20 Argentinian aircraft in air-to air combat and suffer 6 losses (2 to ground fire, 4 to accidents).
The lessons learned from this war would lead to an upgrade to the FA.2 standard starting in 1993. The last Sea Harrier FA.2 would retire in 2006. This build depicts a Sea Harrier FRS.1 ‘XZ 451’ flown by 801 Naval Air Squadron off HMS Invincible in the subdued color scheme applied in the run-up to the war. XZ 451 is credited with 3 air-to-air victories and 1 damaged during the conflict. She would be written off in 1989 off the Sardinia coast.
Info from Wikipedia
The Kit
This kit is a rebox of the ESCI kit that was first released in 1983 so it’s actually an old kit. Features/options include:
- Lowered landing gear only
- Canopy that can be posed open
- Antennas that are crude and thick
- Positionable vector nozzles
- Soft details on the auxiliary blow-in doors around the intakes. They appear half opened only.
- 2 x AIM-9L Sidewinders with the right shape but no details
- 2 x external fuel tanks
- 2 x underbelly ADEN gunpods
- 3 x decal options (pre-1982 Royal Navy, Falklands War Royal Navy and Indian Air Force)
The mold has held up and the panel lines are fine and quite nicely done. There’s not much flash and injection pin marks (one big one on the seat’s headrest though). Typical of Italeri, the plastic is softer than what you get from Tamigawa. Also typical of Italeri, the clear parts are a bit thick and lack clarity.
So, definitely a mixed bag. This kit has been superceded by a more modern tooling by Airfix. However, it’s still a good representation of the Sea Harrier by most accounts. It’s also cheaper. More importantly, it’s much easier to find here than the Airfix.
The Build
Kit manufacturers of this era hadn’t caught on to the idea of designing kits to accommodate various versions of the same aircraft so there’s a general lack of cutting and fitting of different parts together. So while lacking in finesse and details, they usually come together quite quickly. Fitting can be issue but that’s not really the case with this kit, which on the whole, fits well. Problem areas include:
- Canopy halves that don’t quite align
- Rear half of the canopy doesn’t have panel line for the frame
- Intake covers that require adjusting and trimming
- A molded on pitot tube (that’s bent) that will definitely break off (mine did)
- No details inside the nose gear wheel well. Ugly seamlines in there too
- Antennas are butt jointed only
- I had to guesstimate the positions of the belly gunpods
- Nozzles fit crudely although they are mostly hidden after installation
It’s not all doom and gloom though:
- Overall fit is good
- The 4 landing gear fit well and they all touch the ground without much work
 Even with these problems, this is one of my faster aircraft builds due to the small number of parts.
Colors & Markings
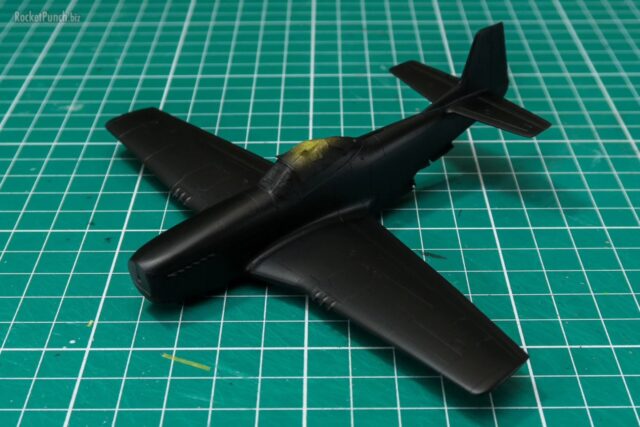
I decided to go with the Falklands War option, which features a subdued color scheme and markings. The color scheme is a uniform Dark Sea Grey over every surface, including the missile rails. After seeing some photos, I decided to break up the monotony by going with Medium Sea Grey with the rails. To add some fading of the main color, I sprayed white over the black base first before the Dark Sea Grey went on.
In hindsight, the red color in the decals seems too bright but I don’t have aftermarket one for the kit so it will do.
Finishing
I used a light gray wash for the panel lines. With the panel lines being so shallow, the effect is quite subdued. I also did some further fading over the top of the kit, since that’s the part that sees the Sun the most.
Epilogue
Doh! After the final photos were done, I realized I didn’t attach the small vane in front of the canopy. I decide that I should move on and not try to deal with the really small part.
Project Log
> Part 1 : Construction
> Part 2 : Painting
> Part 3 : Finishing
Number 8 of 2017