Kit Info
Brand: Airfix A05128
Scale: 1/48
Media: Styrene
Markings: Kit
The Subject
The Boulton Paul Defiant is a British interceptor aircraft that served with the Royal Air Force (RAF) during World War II. The Defiant was designed and built by Boulton Paul Aircraft as a “turret fighter”, without any forward-firing guns.
In combat, the Defiant was found to be reasonably effective at destroying bombers but was vulnerable to the Luftwaffe’s more manoeuvrable, single-seat Messerschmitt Bf 109 fighters. The lack of forward-firing armament proved to be a great weakness in daylight combat and its potential was realized only when it was converted to night fighting. It was supplanted as a night fighter by the Bristol Beaufighter and de Havilland Mosquito. The Defiant found use in gunnery training, target towing, electronic countermeasures and air-sea rescue.
Among RAF pilots it was nicknamed “Daffy”.
In all, 1,064 Defiants were built with the last operational use of Defiants being in India, where they were used as target tugs.
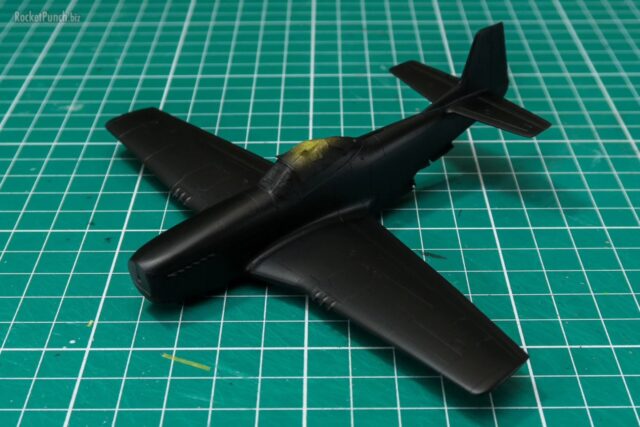
My build wears the markings of N1572/KO-I from 2 (AC) Sqn during the Army Co-Operation Trials at RAF Hatfield Woodhouse in September 1940.
Info from Wikipedia
The Kit
Released in 2016, this is an all-new kit which comprises 99 light gray plastic and 14 clear plastic parts. Molding quality is very good, with very nicely done (if slightly heavy) recessed panel lines. Surface detail on the parts are also very well done. The plastic however is softer than what you get from other companies.
Breakdown of the parts is straightforward with two full-length halves clamping together a long insert where the cockpit, turret and dorsal hump are located. Engine cowl is also separate. The cockpit is detailed with molded details on the instrument panel, separate sidewalls, foot rests and pedals although neither crew nor seat harnesses are included.
The main draw of this kit is the rotating quad-gun turret. The turret is very nicely done internal details like the seat and foot pedals for the gunner though most of it will not be seen once the glass dome is installed. Airfix provides various parts to model the turret stowed or deployed with the unique dorsal ramp being raised or lowered. There are also separate parts for raised or lowered landing gear, flaps, ailerons, elevators and rudder. Even the crew foot step can be positioned either up or down.
There are some unused parts hinting at other versions of the Defiant and two sharply printed marking options are offered in the decal sheet.
The Build
To be honest, I’ve never heard of the Defiant until I saw Airfix’s announcement for it. My immediate thought was: “how fascinating! A rotating turret as the main weapon like a bomber but it’s a fighter.” Once it was released and the price was OK, I immediately plunked down my money on one.
Airfix have come a long way from even the releases from 2000s like the BAE Hawk 109 I’ve built. The fit and finish of this kit is miles ahead of that one. The only issue I had was the the fit of the upper to the lower wings which required some clamping to get the correct alignment. Otherwise though everything fit well. I’ve noted that the plastic is softer than other companies and the clamps did cause some gouging. I just made lemonade out of them and treated them as chipping.
I scratchbuilt some harnesses based on photos I’ve seen online using masking tape and I think they really add to the look of the cockpit especially with the big glass panels it has. I decided to drop the flaps only with all the other flight control surfaces in neutral positions. I also drilled out the muzzles ont he quad guns. And just because I’m me and I apparently have Hulk-sized fingers, I managed to break the port wing gear actuator.
Other than these issues, the kit came together very quickly and fuss-free.
 Colors & Markings
The kit offers 2 marking options with both in the 3-tone RAF woodland camouflage. I have the AK Interactive RAF paint set and I simply had to mask and spray the colors on my usual white marble coat over black base. The AK paints are already quite thin so it wasn’t difficult for the marble coat to still show. As usual I had to go back and forth with the colors to get the demarcations properly done.
The decals are great! They work very well with Mark Setter and Mark Softer and look very good once cured. Alas, I went with the wrong marking: I should have gone with the Battle of Britain marking. But the placement of N1572/KO-I’s markings looked more interesting to me.
Finishing
I don’t think the Defiant was in service long enough to have been weathered severely but I needed to get my practise in so I went ahead with adding chipping using a sponge dipped in a steel color. I’ve come to realize though that a little chipping can really go a long way and I really overdid mine. In the end, a lot of my time was spent toning down the chipping.
I ended up with multiple passes of additional paintbrush chipping with dark gray paint and filters, streaks and smudges with oil paint. For the first time, I was doing them over a satin surface instead of gloss and I think it was easier since there’s more ‘bite’ with it. I also painted on the ehaust stains as one of the last steps.
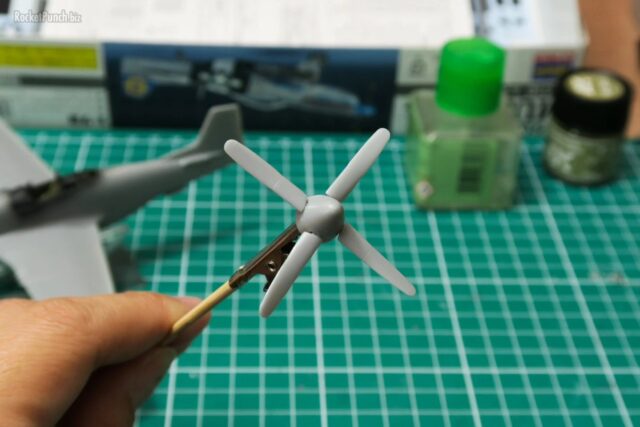
Once I thought it looked more ‘correct’, I gave another satin coat to seal everything up. The propellor and the turret were friction fit. Everything else was carefully attached. I had a lot of trouble getting the broken actuators to line up. Looking back, I really should have just used stretched sprue to make new ones. Last on were the clear parts over the leading edge of the wings.
The turret was posed at an angle with the guns up and the dorsal hump down for clearance. I think these were usually in the stowed position when the Defiant was on the ground but it looked more interesting this way.
In any case, one more WWII RAF aircraft in the bag. Still many more in my stash I’m afraid. 😀
Update 16 September 2020 – It’s been brought to my attention that I missed out on painting the prop tips yellow. I’ve since done so but I won’t be re-taking the pictures. Moving on! 🙂
Build Log
Part 1 : Cockpit
Part 2 : Construction
Part 3 : Painting
Part 4 : Finishing
Number 07 of 2020